With the times we are going through, in which buying decorations for the house has become almost a luxury, the originality of many people is sharpened and using what they have at home to turn it into new things that can help change the decoration for complete, is one of the options that we must always keep in mind.
This makes DIY (do it yourself, as it is known in English) has become an icon for many people when it comes to decorating: crafts with recycled material .
From the simplest things like putting a mural on a wall in the house made by us instead of buying a vinyl, to bending the tips of a fork to turn it into a beautiful painting, a coat rack, a key ring and hundreds of other options, everything you can think of is allowed if you wonder
how to make decorations for the house with recycled material .
Crafts with recycled material: forks
Many times we throw things away without knowing the number of uses that can be given to it and how beautiful it can be in a new place. Why didn’t you know all these uses that can be given to a fork?
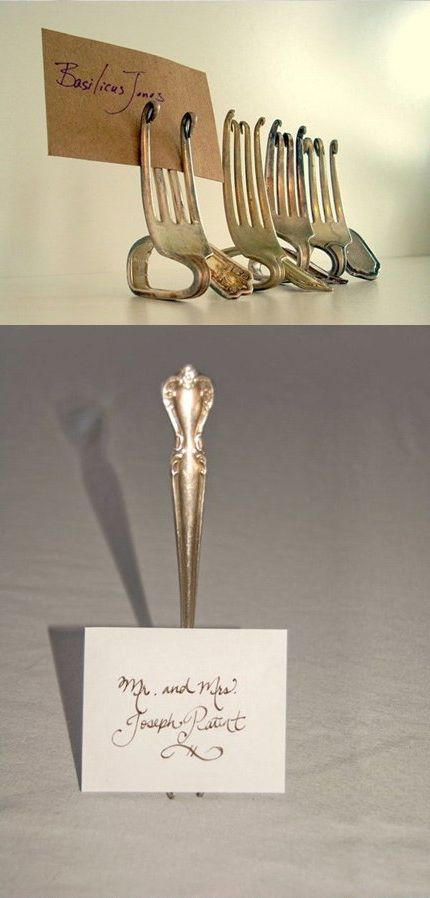
Picture frames
Simply bend the tines of the fork to get a base.

Card holder
You can bend the tines or the handle of the fork.
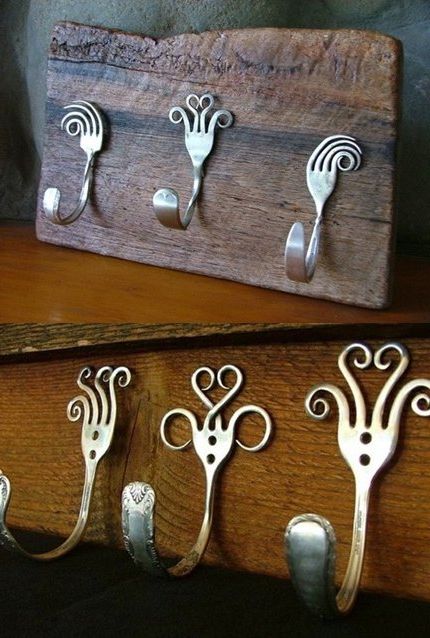
Coat rack
Another very simple craft to achieve a wall coat rack. The fork is hammered to make its teeth flatter. The handle and tines of the fork are bent and then clamped to a board.
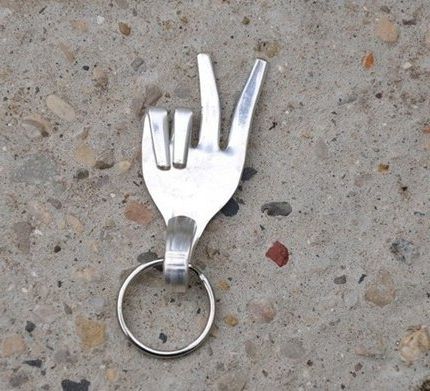
Key chain
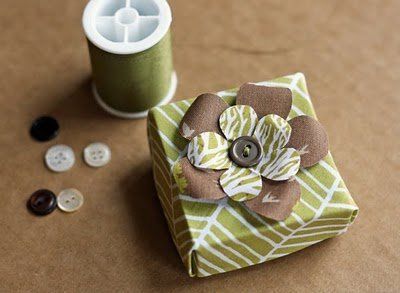
Fabric origami box
A beautiful box to give as a gift, since in it you can store all kinds of small objects such as jewelry. In addition, it is very decorative. And it can be done with any type of scrap of fabric that is in your home. Leftover fabrics always give us a lot of possible crafts with recycled material.
As a first step you will have your piece of fabric, in a square shape on the table (the size will depend on how big you want to make it). Already being starched, you will pass the iron to facilitate its handling.
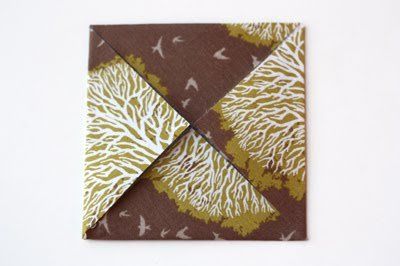
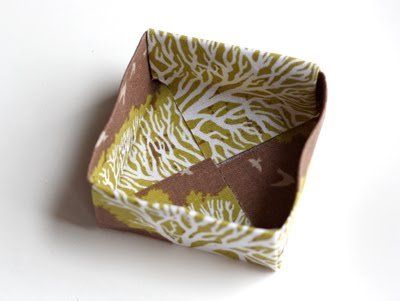
Observing this first figure you should get a square that has four identical triangles that meet in the center. You will get it by folding the square in quarters and joining the corners with the center, twice.
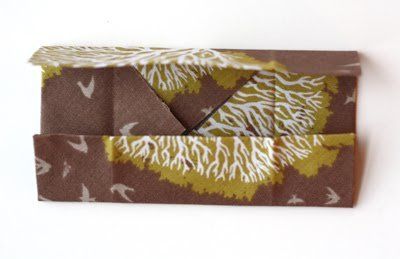
Then you will follow the shape of the square, but you will reduce its size, folding the four sides, proportionally, as in the image.
Following that, you will undo those folds again and it will be something like this.
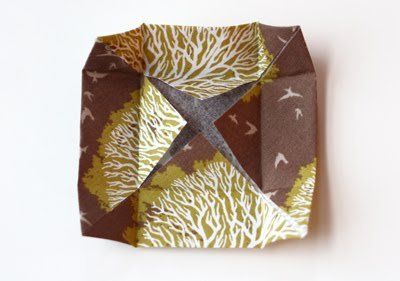
You will now open two of the opposite faces completely and leave the other two intact. The two that you opened will have the sides of the lid pushed inward.
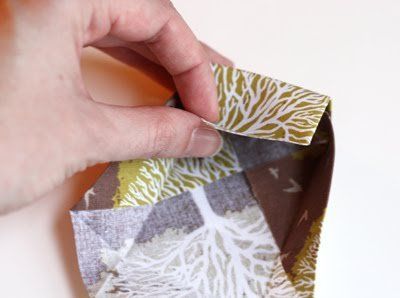
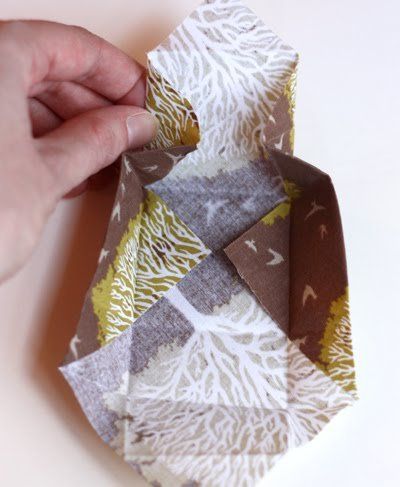
Then you will take the rest of that fold, by means of a hem and help of glue to form one of the walls of the origami.
Finally you will repeat that procedure, first with the opposite lid and then with the other two. If you are wondering how to make the origami lid, you will simply have to make a larger mold, but with smaller hems, in this last step.
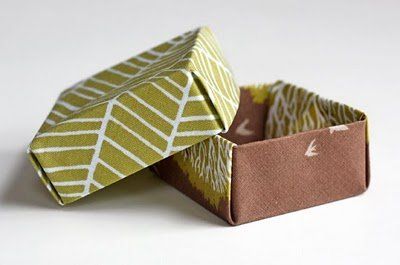
We recommend you decorate it with some ornament on top, for example fabric flowers.
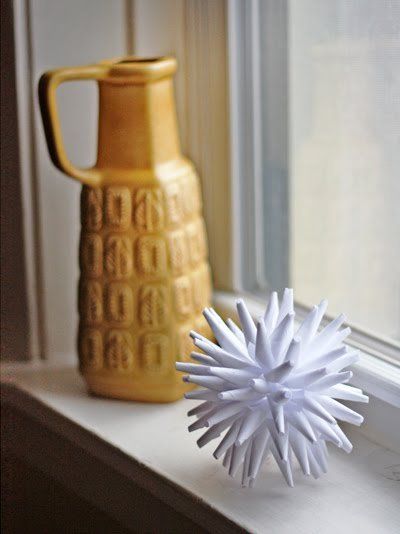
Paper ornament
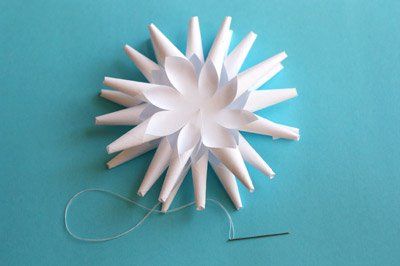
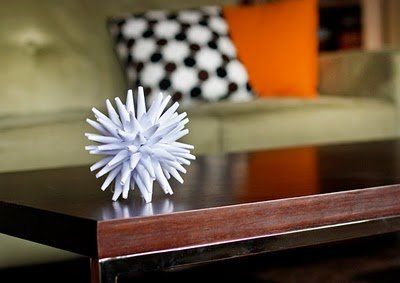
If you are one of those who, when they have a free afternoon, like to make crafts to give as gifts or to decorate their home, then this idea may interest you. Today we will show you how to make a ball with spikes or “porcupine”, based on paper, to decorate the home.
The necessary materials are paper, scissors, ruler, pencil, needle, thread, rubber and glue.
You will take white sheets from the printer and an old CD. You will use it as a mold to achieve a circle.
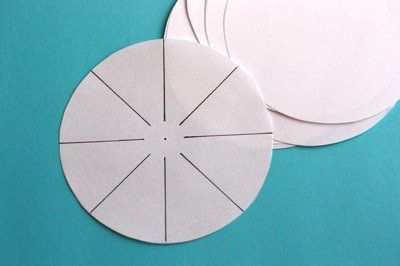
You will divide the outer circle as seen in the image and then with the scissors you will cut the traced lines.
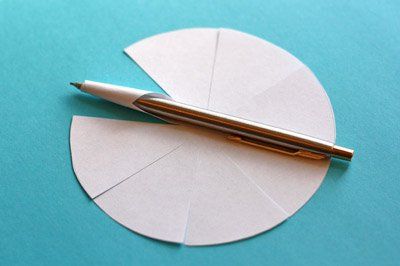
Then you will roll each white tip and stick it with a little glue. Perform ten of these stars.
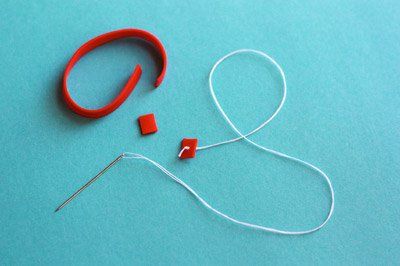
Take a small piece of rubber band; pass the thread and tie a knot.
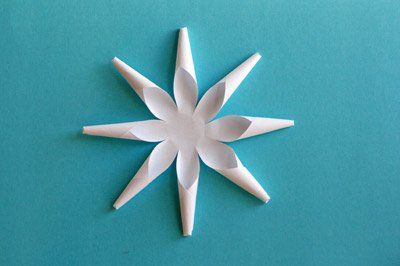
You will place five stars with their flat side down, one on top of the other and insert the thread through the middle.
Then he will place the other five next to these, but on the opposite side, joining them with the thread as well (before finishing and making a knot, place a second piece of elastic band).
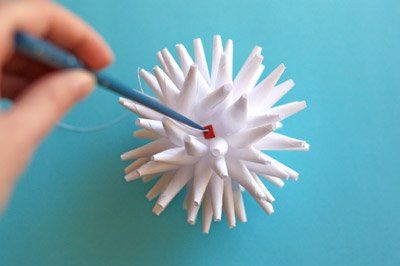
Here it will be relatively early, although with a lack of form. Play with the rubber bands, the thread and the paper itself to achieve the best result.
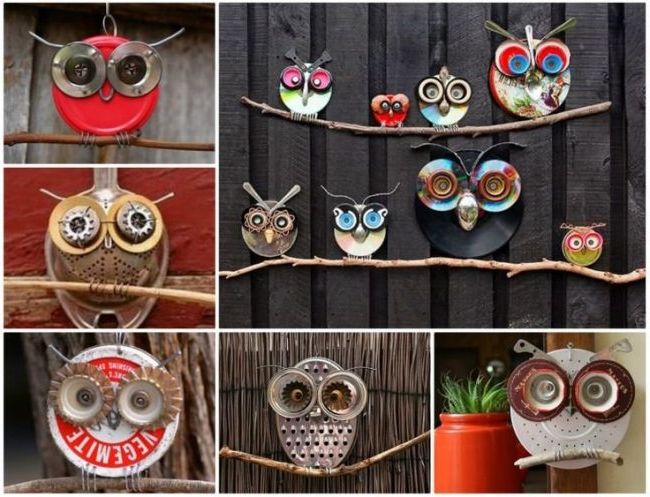
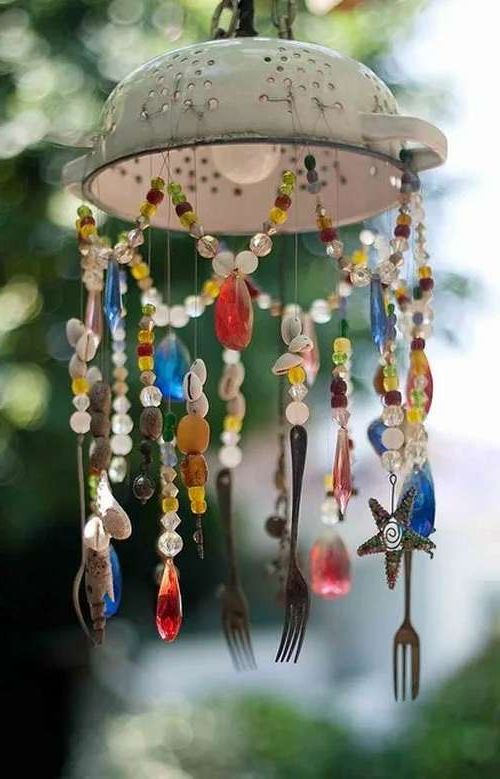
Crafts with a strainer
Decorating and recycling is a very creative task that allows us to take advantage of elements that we have at home, and also save money. We show you a great idea, which is to take advantage of an old colander. With our modernity today, food mills are still used but not as much as they used to be, because today everything is automated and we can do a thousand things without having to use it, but if you have one, why not use it to decorate?
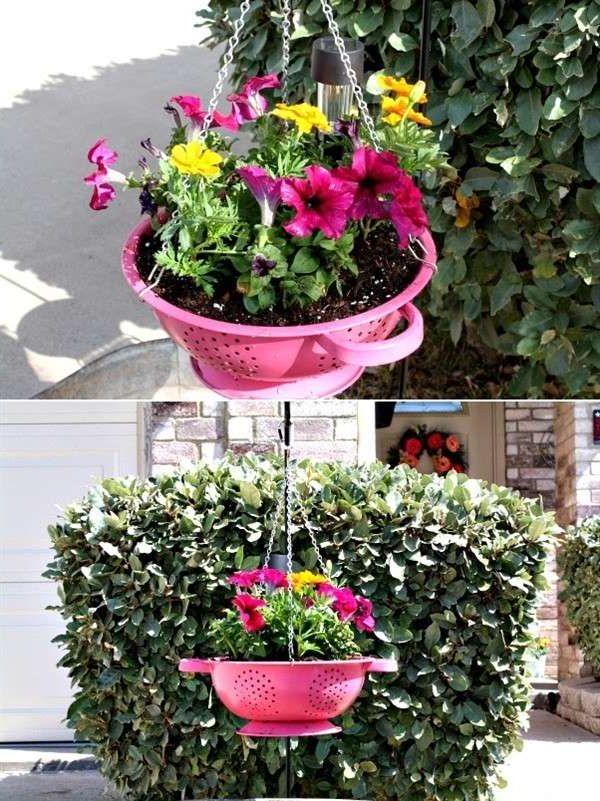
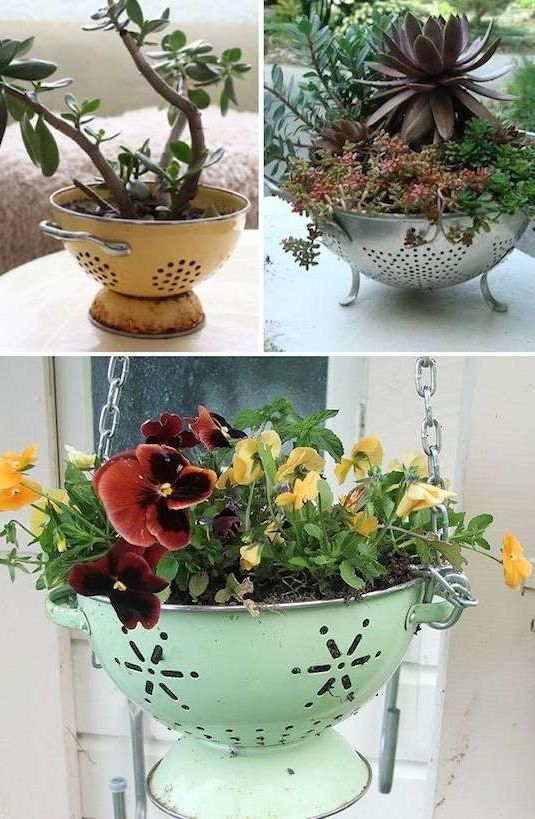
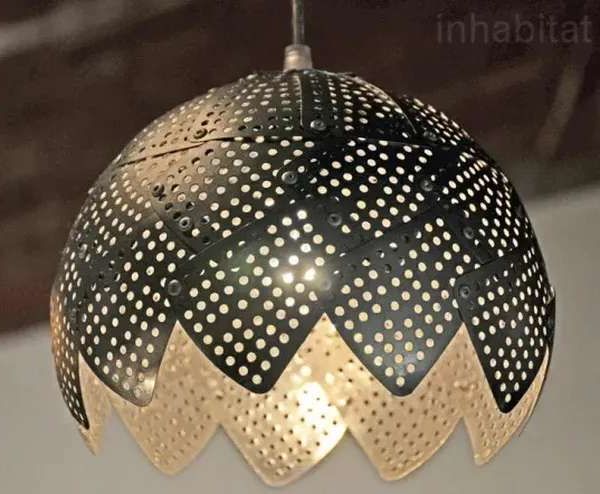
Now you can take your old masher to decorate the house, using it as a planter on the living room table, or a hanging planter if you add a piece to hang it from the ceiling near a window, an adorable solution. You can use it as a lampshade, although you must be careful to make the connections and that it fits well but is also safe, we do not want to damage the electrical installation or expose ourselves to something burning, pay attention to that.
And you can also make a charming centerpiece, matching the color of the strainer and placing a candle. It is a great idea to decorate for Christmas, or when you have a special dinner, a simple detail becomes a fabulous alternative.

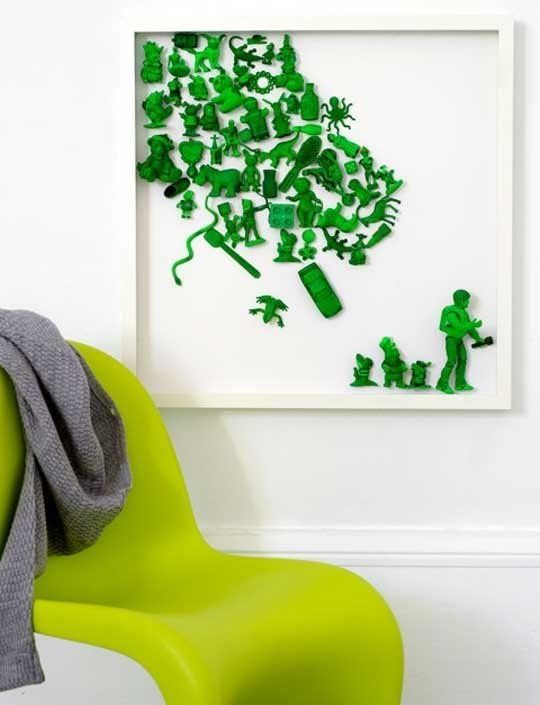
Recycled toys
So you’re past the toys? Classify them and choose a few. You can donate them, trade them, hide them indefinitely, or even throw them away. But a good idea that has recently been implemented is to reuse those toys that we used to love. Here I present some inspiring ideas to recycle those toys that we have archived for a long time; some are practical, and others not so much.
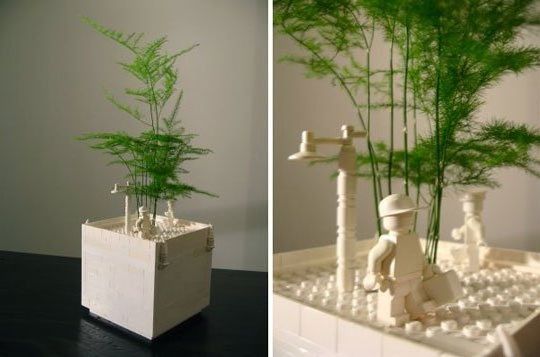
Transform those little plastic pieces into art.
Build beautiful vases or pots from Lego pieces.
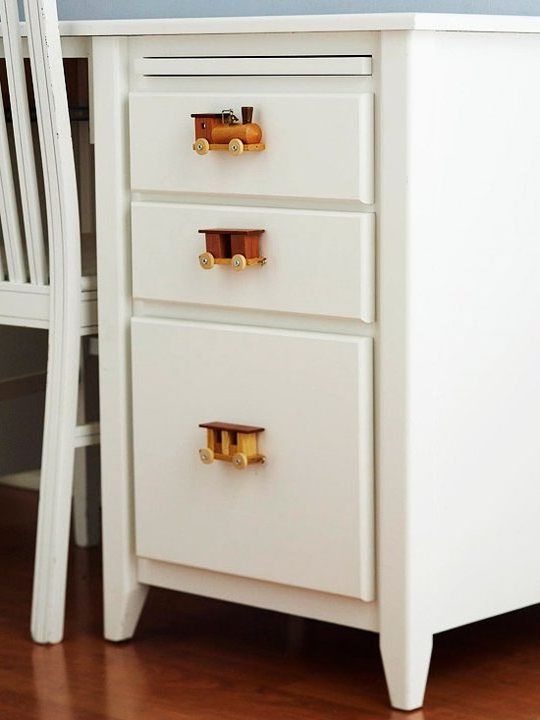
Create original drawer latches with old wooden toys.
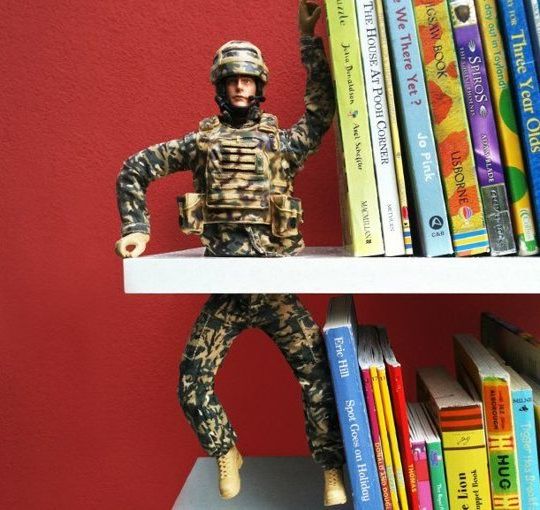
Let a plastic soldier take care of our books.
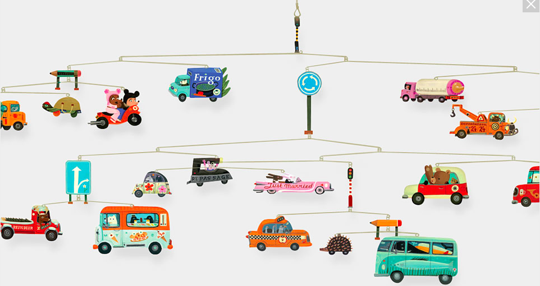
Use old collectible cars to make nice mobiles.
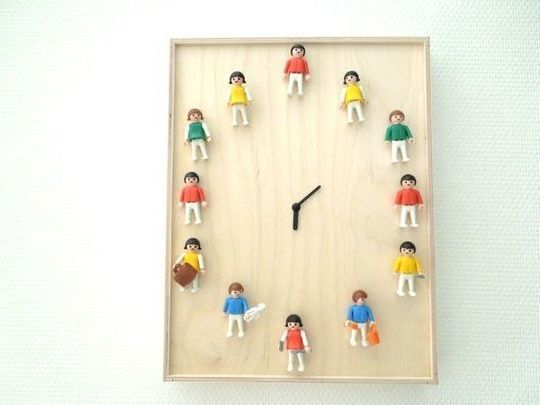
Place the unforgettable Lego characters on a wall clock.
Wall key holder
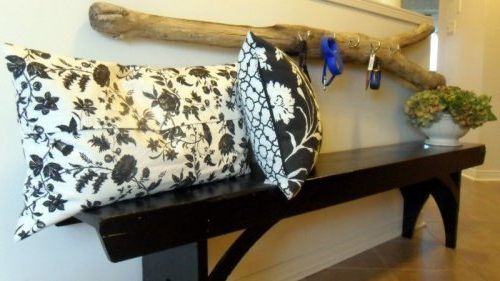
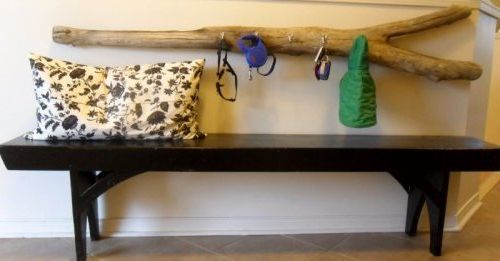
Creating a true accent on the walls often becomes a challenge, but not because it is something difficult to achieve, but because many times we do not realize that a small creative detail on them can make them something truly surprising. That is why today we wanted to present you with a proposal that is very easy to carry out and that can really give the hall a different and decorative touch. It is a simple large keychain and built from a rustic branch.
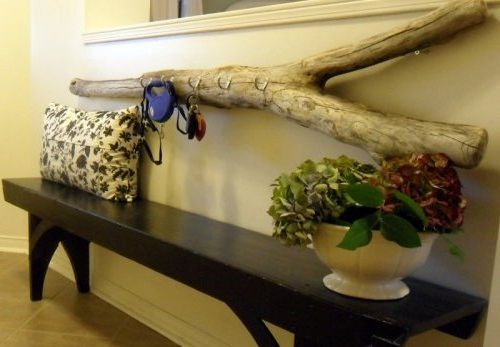
This idea is especially recommended for those who want to give their walls a good look without having to spend on expensive wallpapers or valuable works of art.
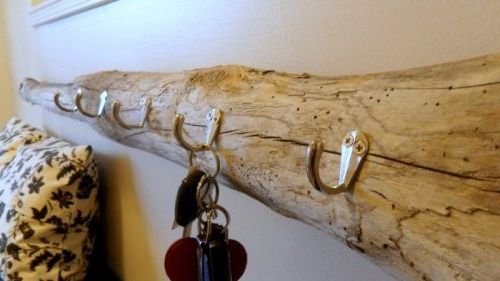
You will not need more than a piece of wood, one of those found at the bottom of rivers or lakes, since they have a more interesting appearance thanks to the erosion that water makes them, or a branch lying in a forest. Hooks, a drill, and a few screws will also be needed to attach the piece of wood to the wall.
We can play with the size and shape of the wood to give this key holder a personalized touch, which will make it unique.
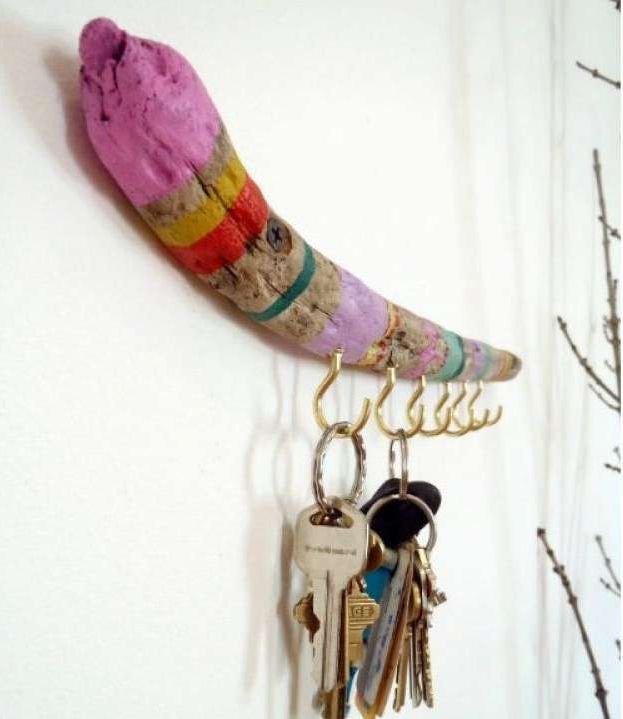
First the key hooks are placed on the wood
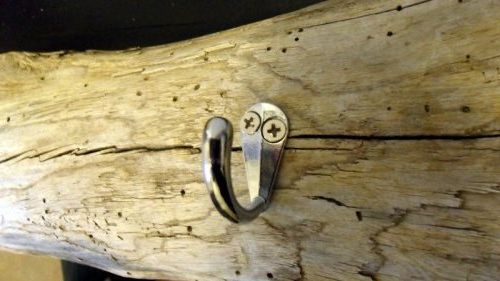
Place the amount you want.
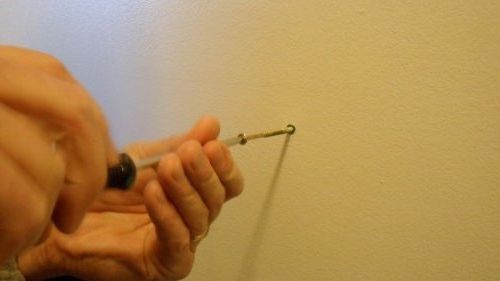
On the opposite side, you place two small hooks to hang the branch from the wall.
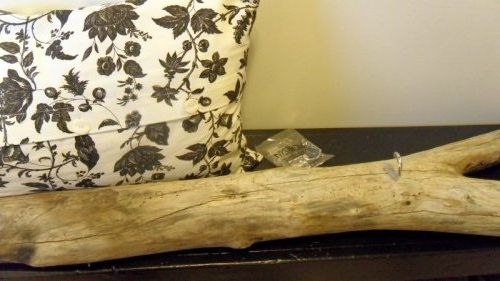
Of course, in the wall you will have to install the support screw.
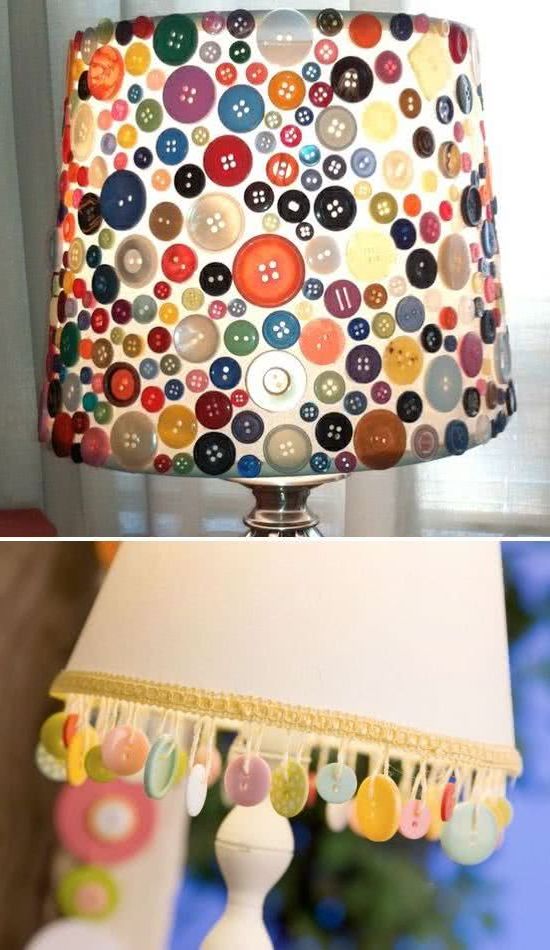
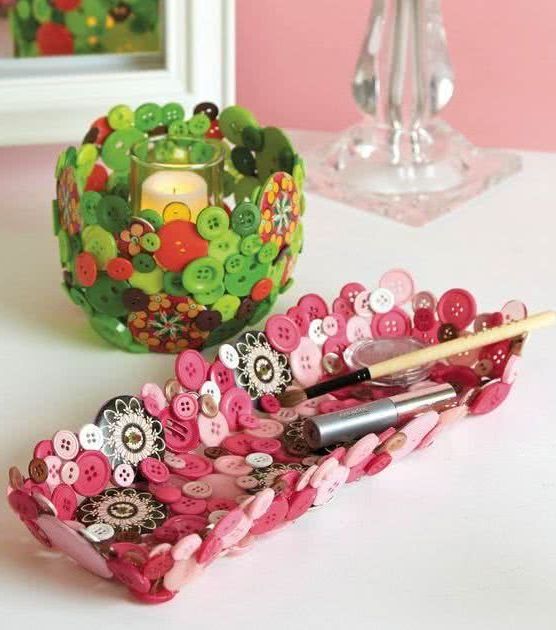
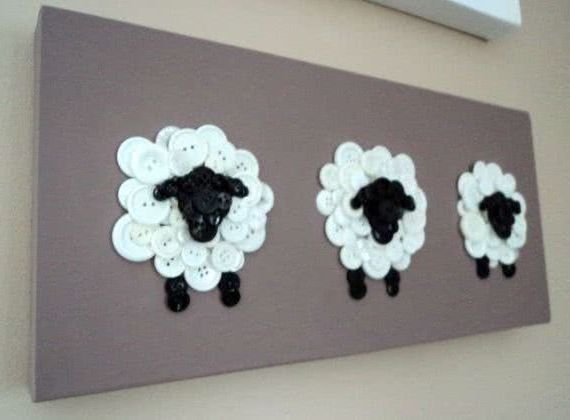
You can make animal figures made with buttons of different sizes.
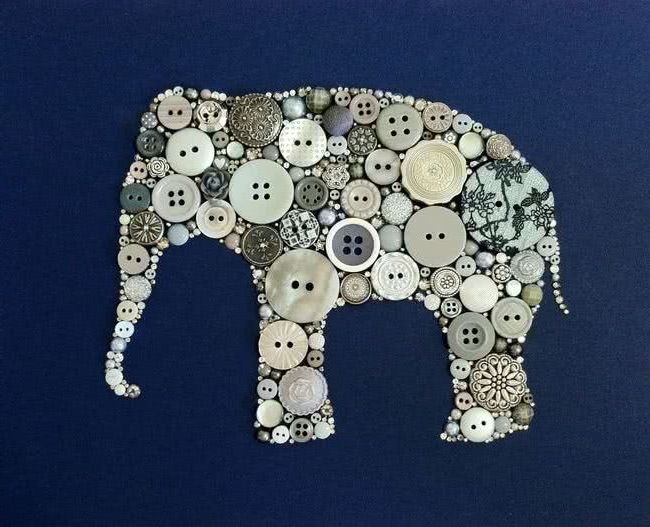
Simple and beautiful ideas like these, are worth sharing.
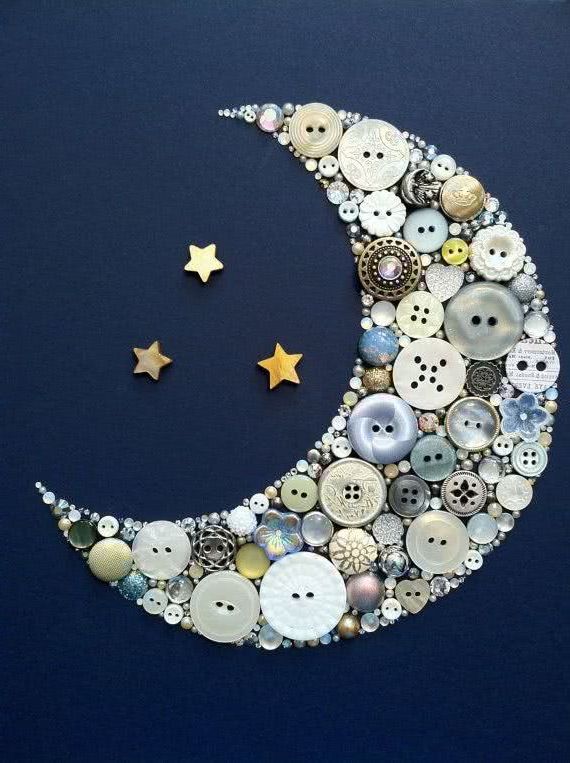
Or draw moons with cute and decorative buttons.
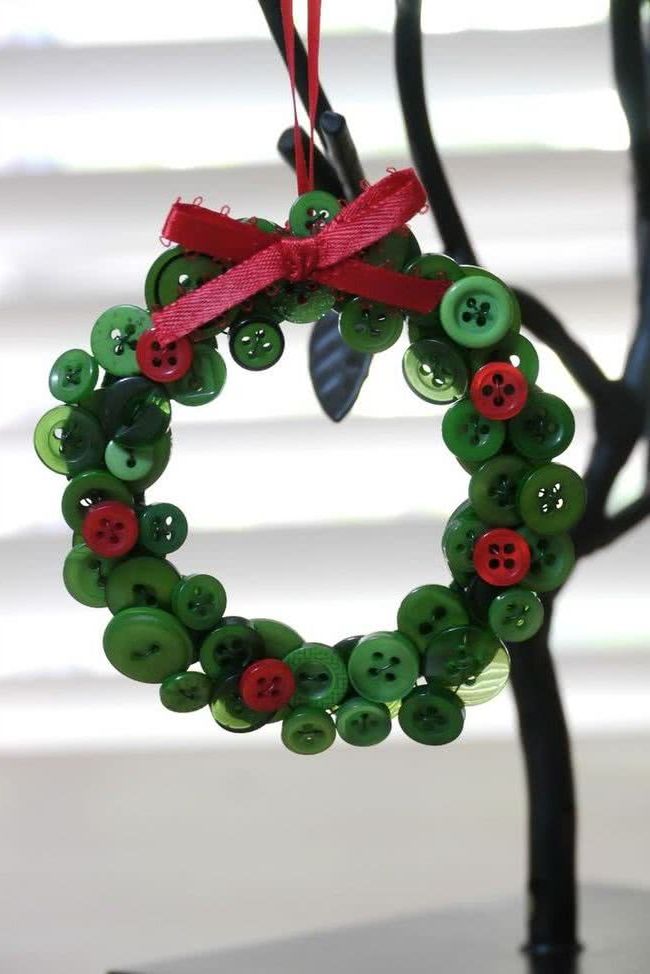
To give as gifts, to decorate the house, to do with the children and at the same time to recycle.
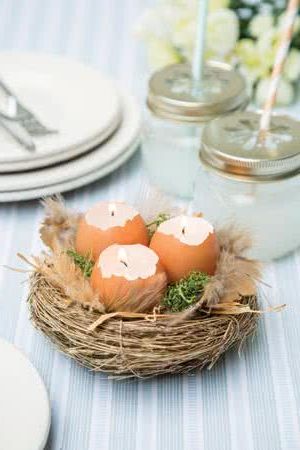
Handmade candles
Countless eggshells are discarded in food production every day, someone very creative has come up with a way to use them to create a simple and fun candle and minimize at least some of this enormous waste.
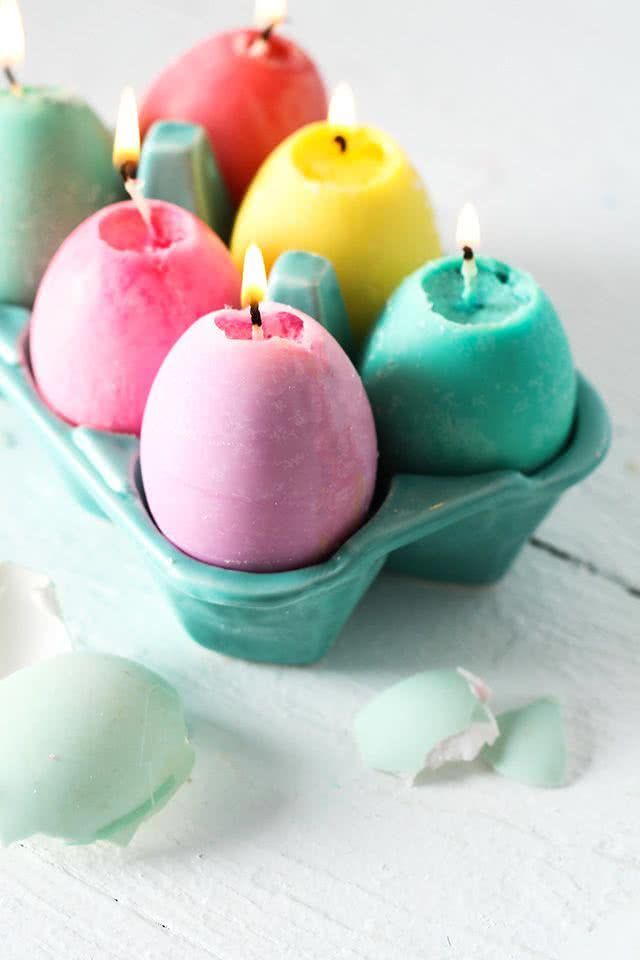
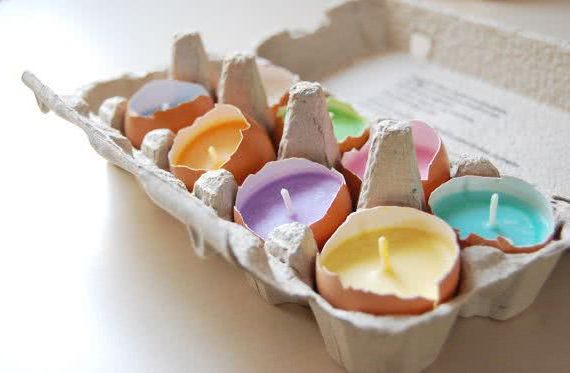
First of all, you have to clean the empty eggshells, then carefully make a hole through which you pour the hot wax next to the pavilion that will act as a wick and that’s it.
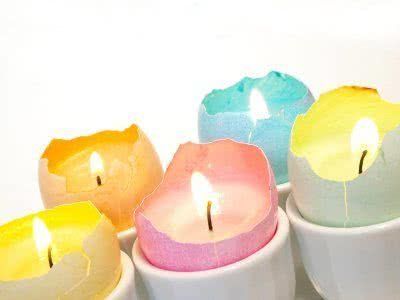
It is a very decorative candle because its special shape makes it possible for it to float on water.
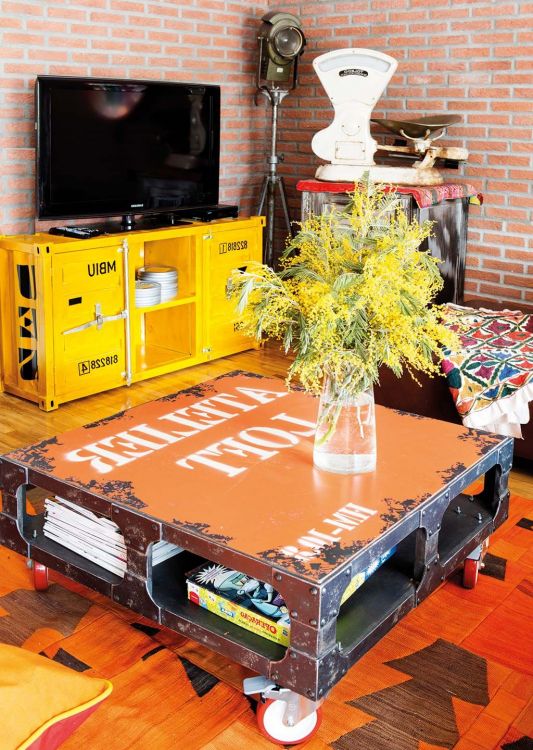
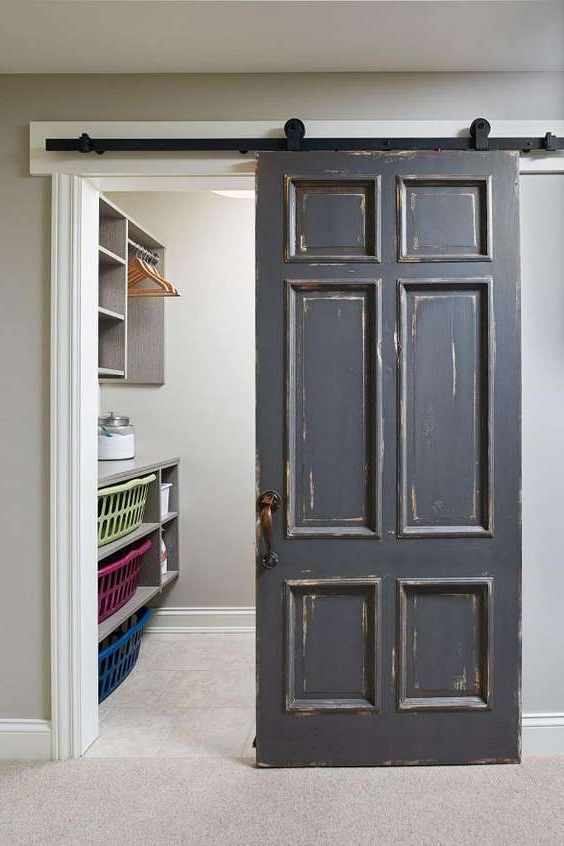
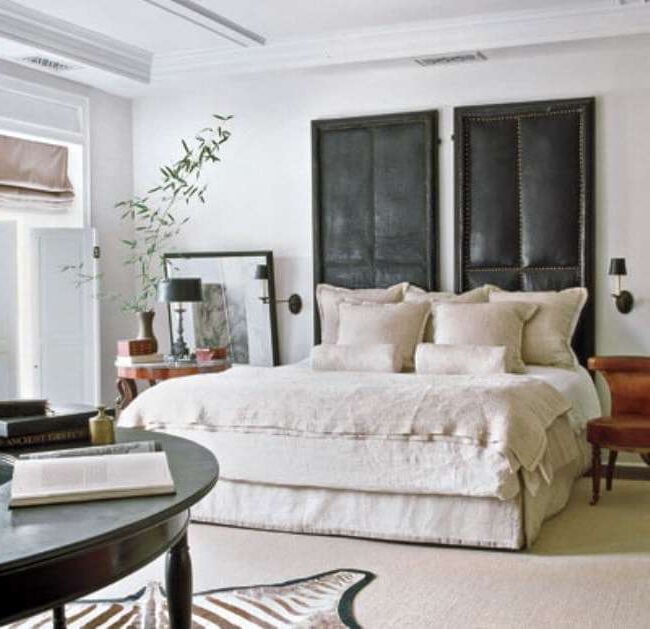
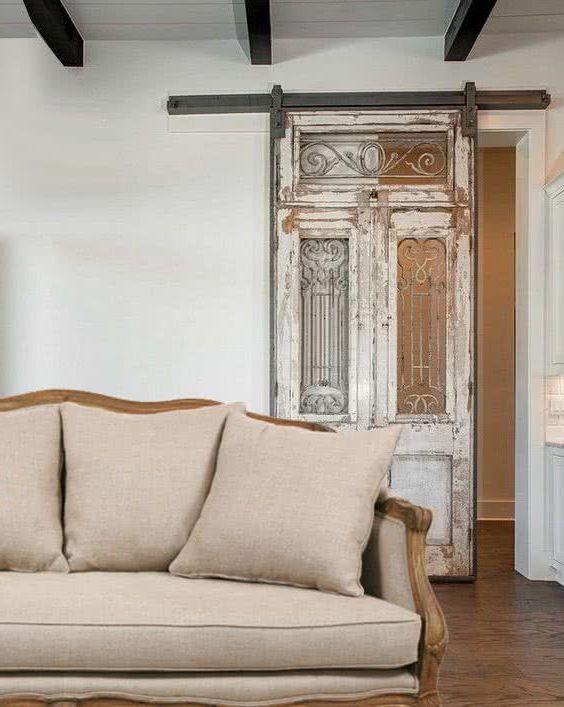
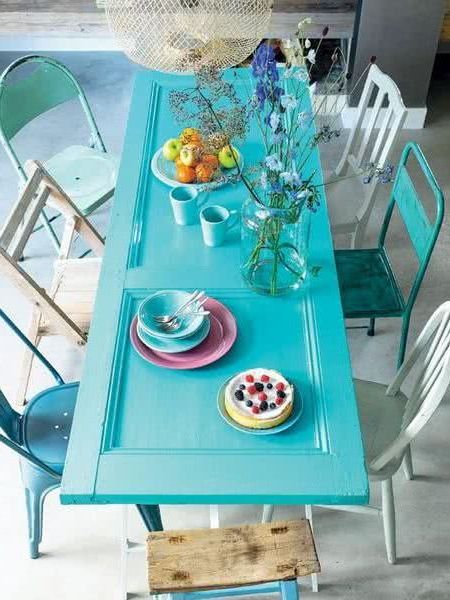
Recycle old doors
The old wooden doors have that charm that is impossible to waste. Recycling and reusing old items not only contributes to the environment but is also very fashionable. It is about giving new use to objects made of noble materials such as wood or iron that have been masterfully crafted by ancient craftsmen.
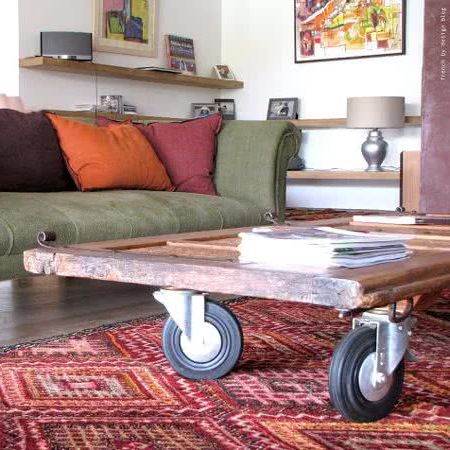
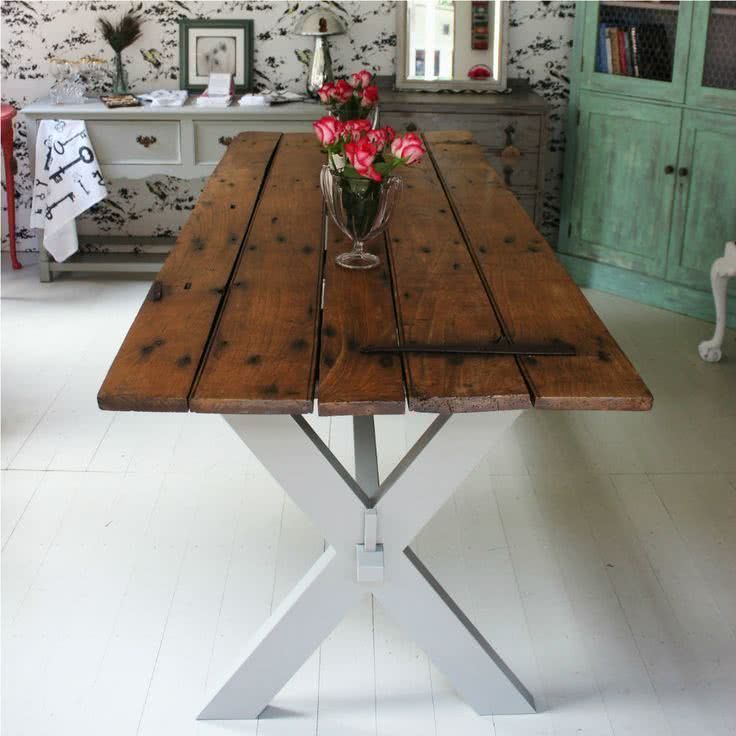
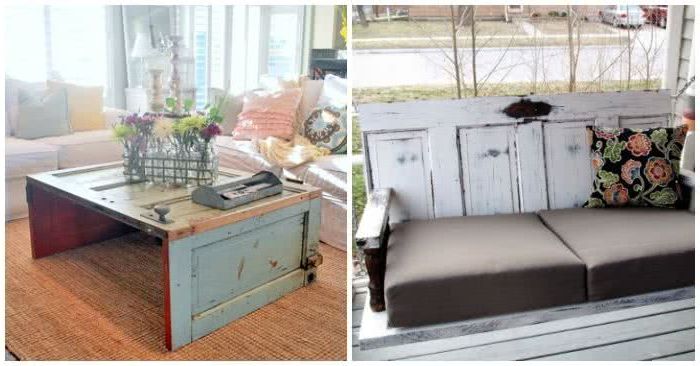
There are doors that deserve to be recovered, either to make a beautiful headboard, to make tables or to decorate walls. It is always possible to find different uses to reuse noble materials, very different from their original function. Here you will find very original ideas to reuse old wooden doors that can serve as inspiration.

How to paint baskets
Honestly, I don’t know what we would do without baskets. Every room in my house has at least one, if not several. We use them for everything, to store toys, clothes, etc.
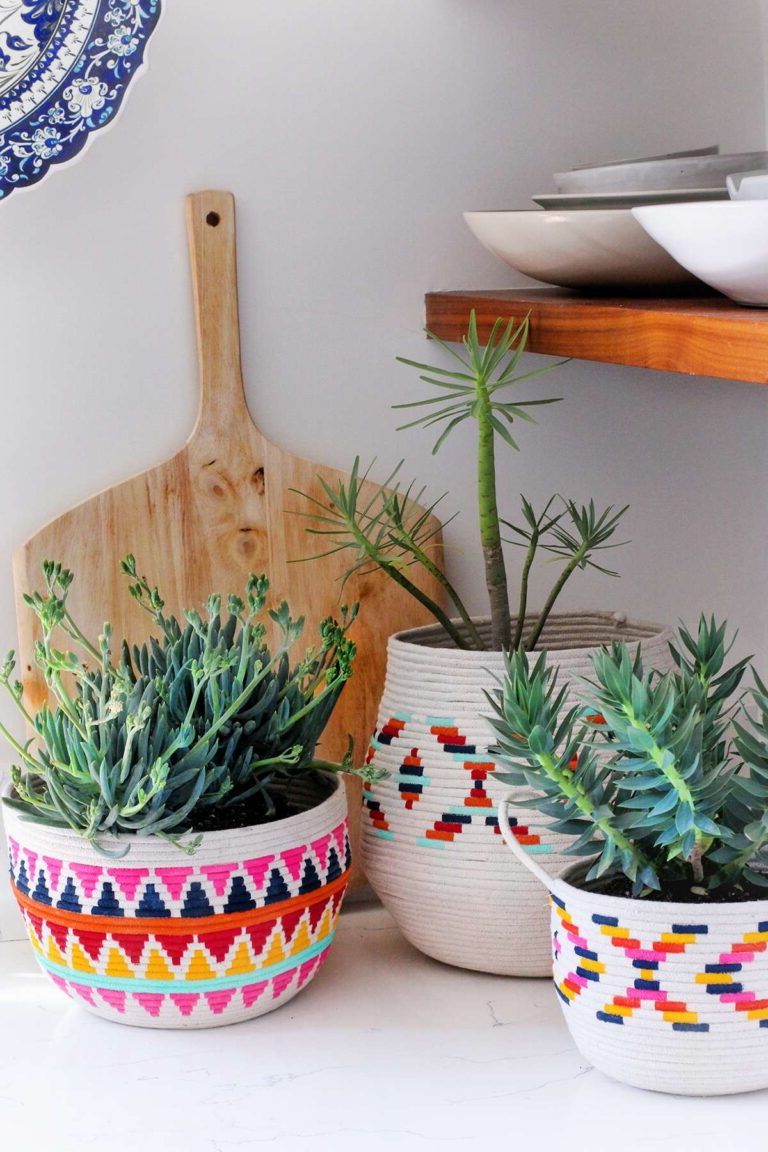
I personally admire African baskets, which use a lot of color and pattern in their design. If you think about it, it would be fun to try making your own decorated baskets. It is very easy to personalize the baskets and give them a bit of our personality.
Here’s what you need: one or more baskets, a selection of colored enamel paint, brushes, rollers and painter’s tape.
You can start by drawing different patterns for the baskets in a notebook, then apply them to different sections of the basket. You paint them and wait for the paint to be almost dry. The job couldn’t be simpler.
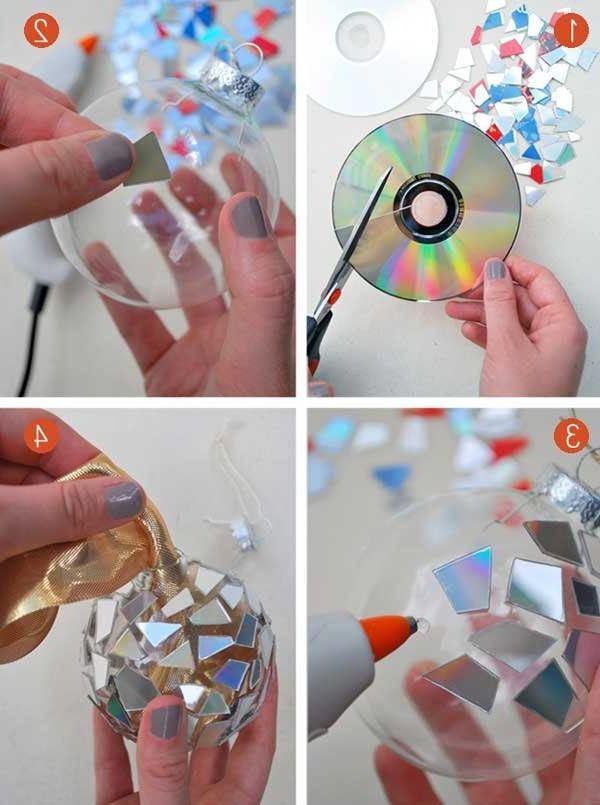
Recycled Christmas Sphere
A Christmas ball decorated with pieces of an old CD.
 More crafts with recycled material: Recycled lamps 10 ideas step by step